Art is what you can get away with. -Andy Warhol
 Hello internet friends! Mother’s day is right around the corner and if you are still in need of a fabulous gift for the mama/grandmother/nana/stay at home dog mom in your life check out this DIY pet paw canvas art.
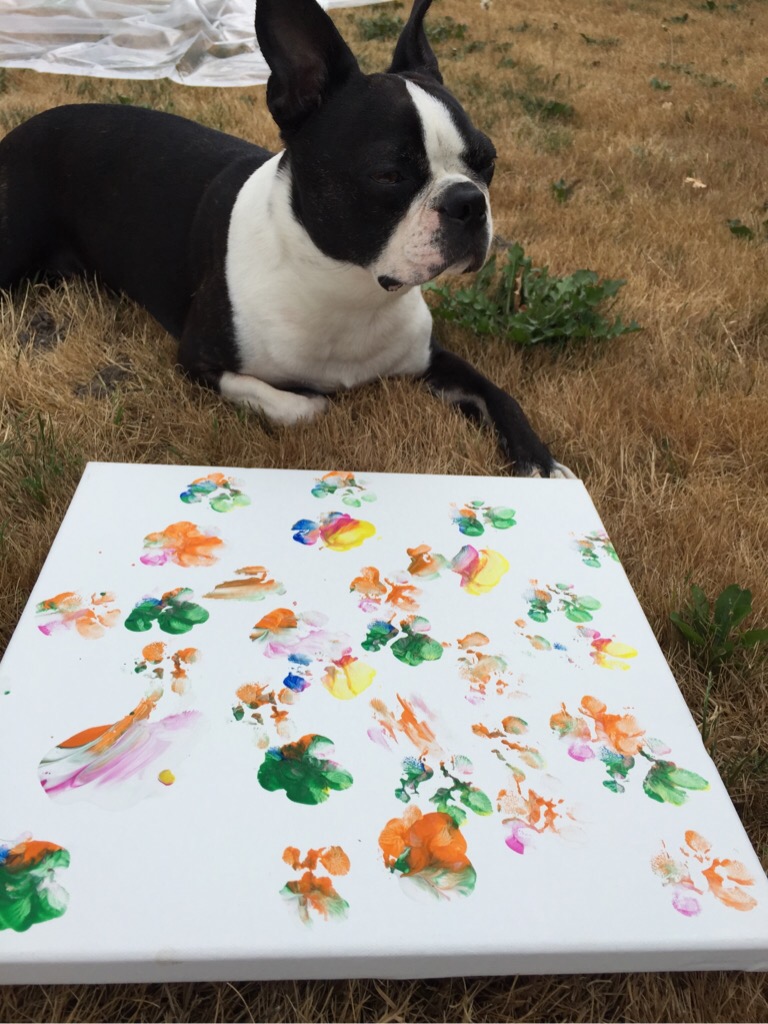 Today on Make it Monday!(Wednesday…whatever) we got a little creative, Basil and I did some custom paw print art work. It was super easy and we had a lot of fun. I seriously love the 2 pieces we made and can’t wait to hang them in our new home!
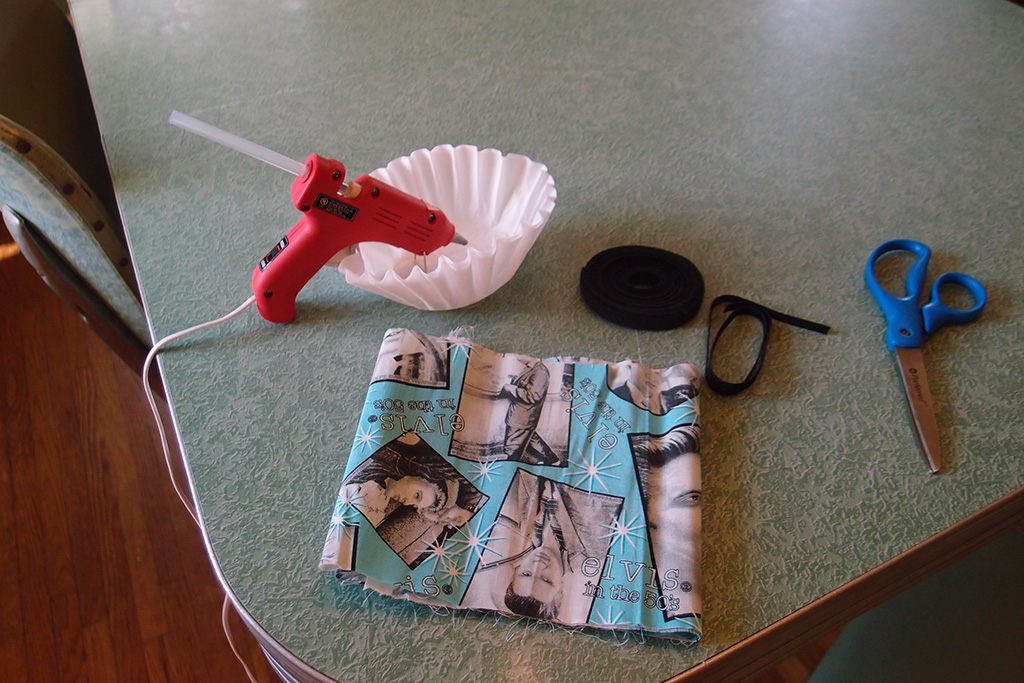
What you need
- Blank Canvas (Any size. I used square)
- Non-toxic water based acrylic paint (I used Crayola washable kids paint)
- A plastic shower curtain liner or painting drop cloth
- Wet wipes
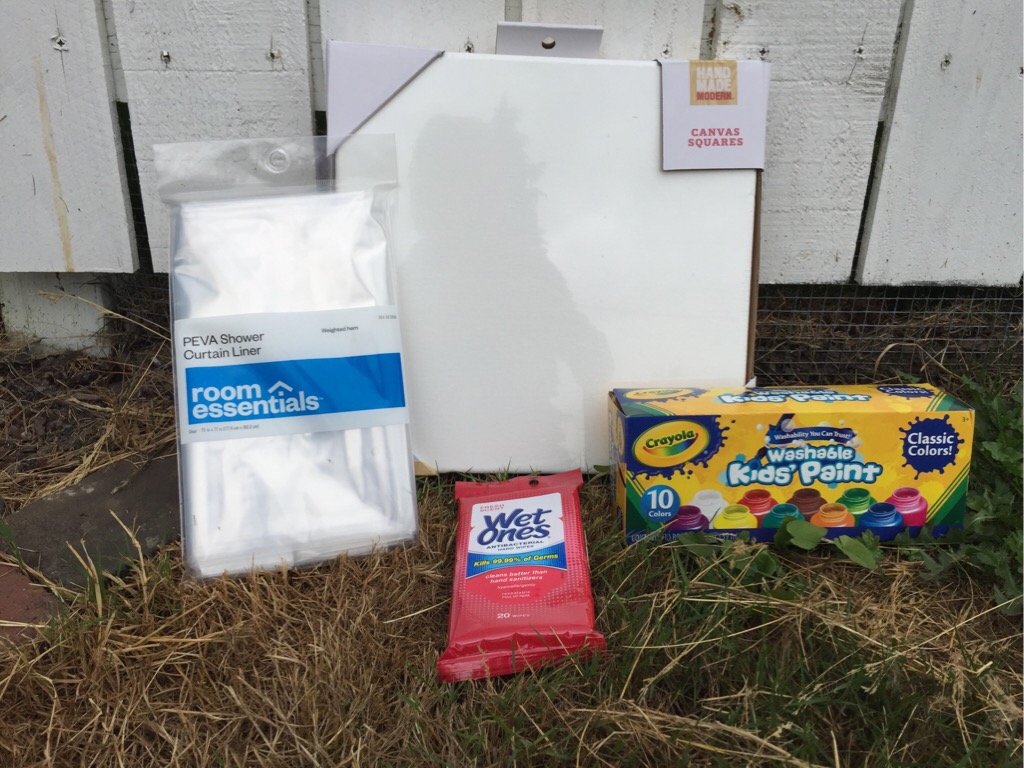 I found all these things at Target at a great price. I was surprised to find the canvas but I guess Target is getting pretty artsy. That worked in my favor! I decided to use the shower curtain liner as the floor covering and I couldn’t be happier. I purchased the cheapest one they had, $2.49, and it worked like a charm. The magnets those things have weighted down the sheet so when I throw it out on the lawn it stayed put, even with a bit of a breeze.
 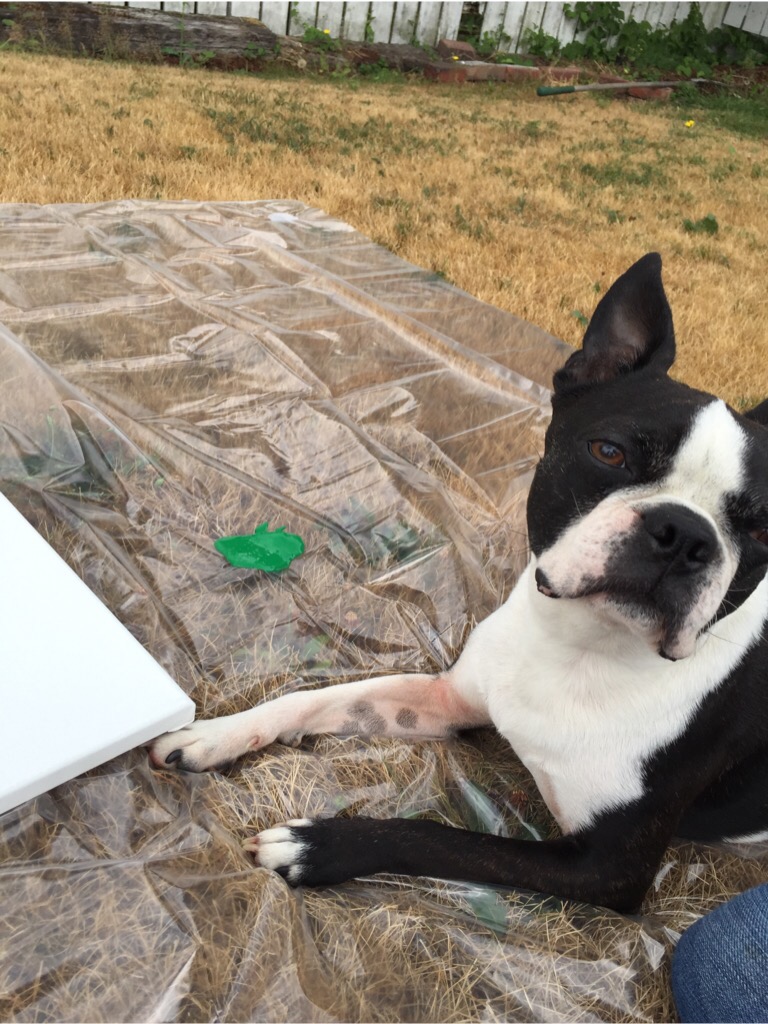 Next all I did was set out the canvas onto the shower liner, poured out a small amount of my desired color onto the liner next to the canvas, and let Basil walk through it. Then I had Basil walk directly onto the blank canvas. He wasn’t super into that part but he put up with it! You can also apply paint to 1 paw and press that paw onto the canvas. We did both.
After its all said and done the clean up was a breeze. I used the wet wipes to clean the paint off Basils paws and to clean the paint off the shower liner. I thought about just throwing the liner away but we really didn’t make that much of a mess. If you have a larger dog with bigger paws I would recommend a large wet wash cloth and maybe just saying good bye to the liner.
Once back in the house (We did this all in the front yard. I’m sure my neighbors and the UPS guy were all very curious as to what was happen!) Basil got a short little puppy bath with our favorite Burt’s Bees Apple & Oatmeal dog shampoo and is now happily napping.
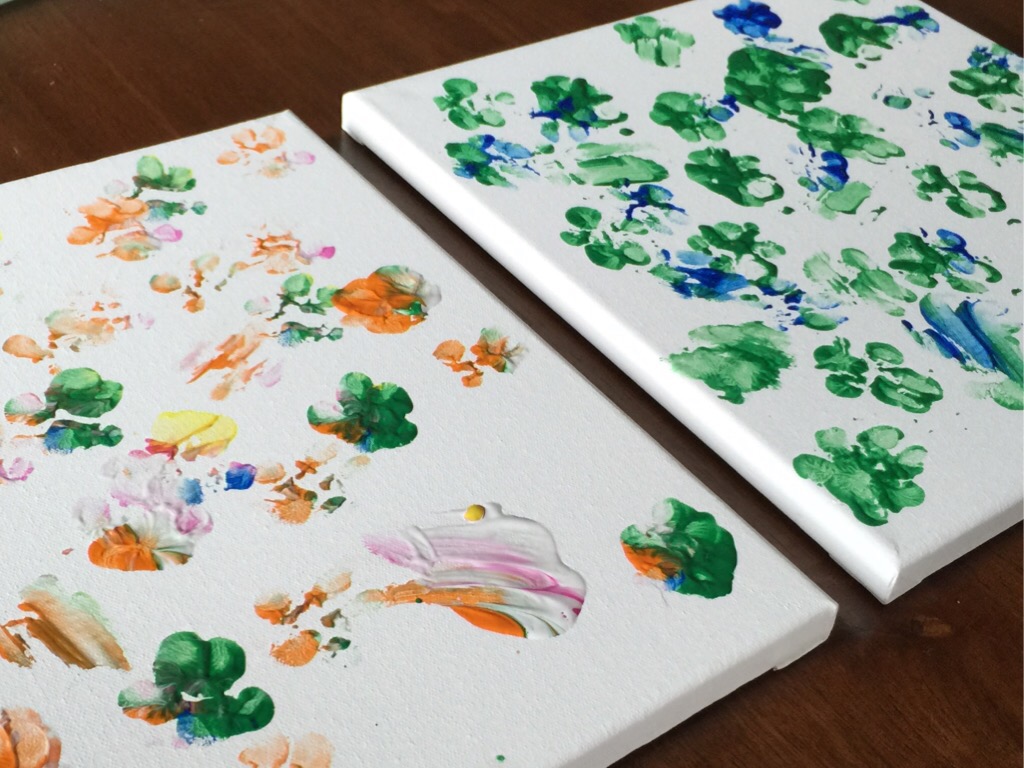
Here is what our final creations look like. Once they’re dry I’ll add Basil’s name to the corner. He did do the majority of the work after all!
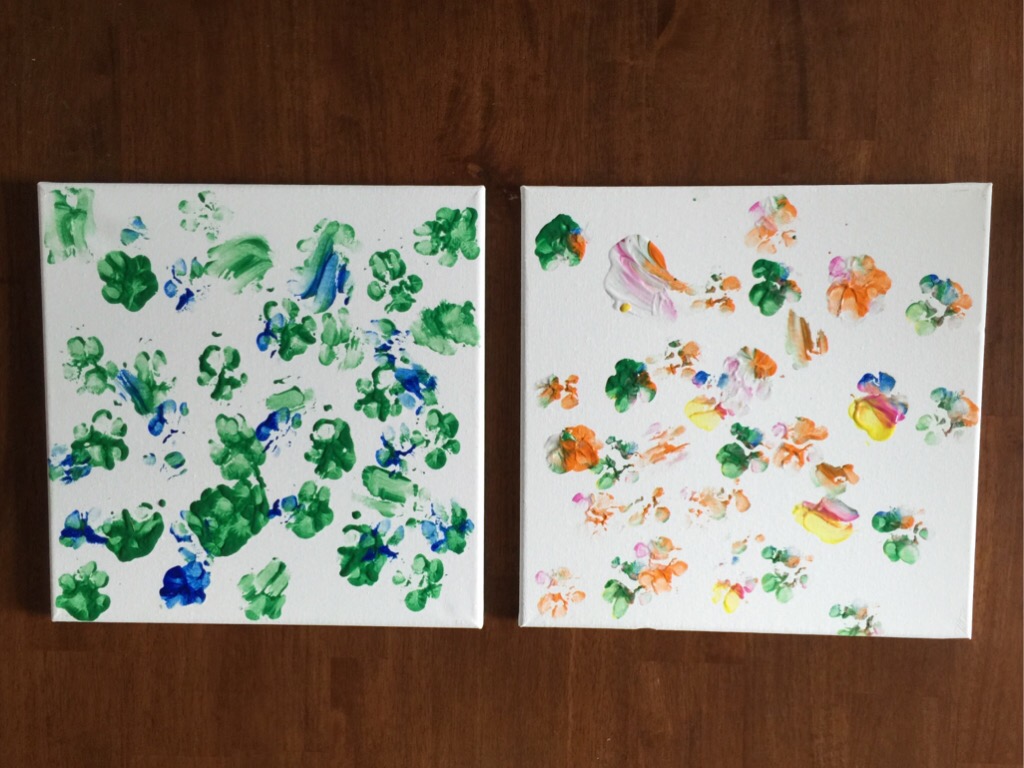 What do you think of our art? Do you love it? I think it’s so post modern.
Let me know if you try this project and how it came out. I would love to see it!
A big thanks goes to Treats a la Bark for the original idea. I saw their take on this fun little art piece on Pinterest and had to give it a try.
Also, 57 days to the Blogpaws 2016 pet blogging conference!!! Who is excited!?
Travel well, nap well, live well!
-Abbey & Basil
 Step 1: Mark where you want to position the legs and drill holes.